Get to know the photo book "The Most Beautiful Trails of Patagonia"
Torres del Paine, El Chaltén, Bariloche, Ushuaia, Villarrica, Cerro Castillo, Dientes de Navarino and Parque Patagonia
Ausangate Circuit, Peru – Itinerary and tips

Map of Ausangate Circuit split in 4 days, with 47 km (29 mi) of distance and 2,032 m (6,666 ft) of elevation.
Best season
From May to September is the dry season, with July and August being the coldest months. During this period, rainy days are rare, but you have to be prepared for the worst possible weather, as it can always happen. During the fifty days I spent in the Peruvian mountains during the winter of 2022, it only rained and snowed for some hours in one day.
Description
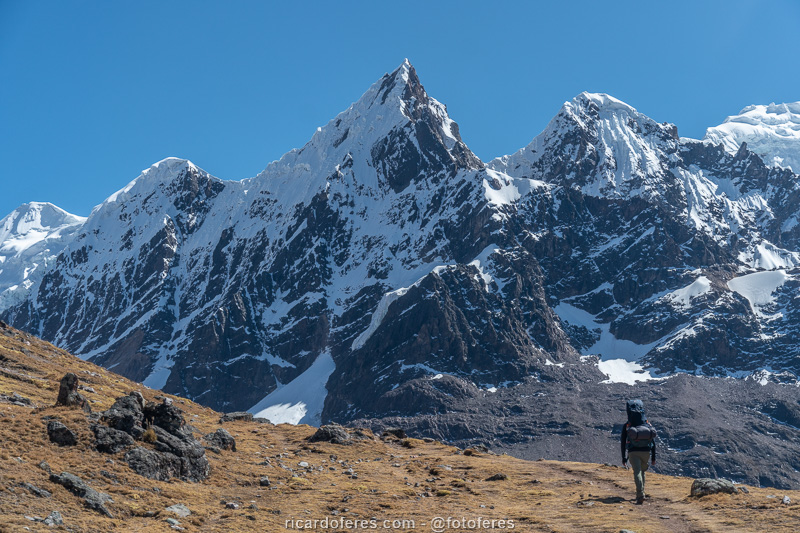
The Ausangate Circuit is located in the Vilcanota Range, which is part of the Andean Range in southern Peru. The trail described here is a little different from the traditional path as I took a detour to pass through a region that I consider more beautiful, sleeping on the shore of a lake that has no camping structure. Due to the short distance of this hike, it is possible to do it in 3 days, but if you want to sleep in the most beautiful campsites, it is recommended to do it in 4 days.
The trail is almost always between 4,500 m (14,760 ft) and 5,000 m (16,400 ft), having the Paso Palomani as the highest point, with 5,092 m (16,706 ft), so it is necessary to do a good acclimatization before this circuit.
During the day, when there is no wind and clouds, the temperature is high enough to walk around in a t-shirt and shorts, but as soon as the sun goes down, the temperature drops quickly and, at night, the minimums are almost always below freezing point. When I did the circuit, the minimums were between 2 ºC and -10 ºC (35 ºF and 14 ºF), but be prepared to face even lower temperatures, in case of a cold front.
Base city
Cusco is the closest big city and, as it is also the base city to go to Machu Picchu, there are many options for accommodation and restaurants, but prices are higher than in Huaraz, the base city for hikers and climbers in northern Peru.
Where to sleep: For those looking for budget accommodation, Eco Inn Hostel is a great option, with comfortable rooms, good shower, strong wifi and the traditional breakfast of this type of accommodation in Peru, with bread, jam, butter, tea, coffee and eggs. The hostel is very well located, very close to Plaza de Armas and the staff is helpful. Overall, it’s great value for money.
Onde comer: I haven’t been in many restaurants in Cusco, but in two of them I ate very well and I can recommend them.
- JJonas Cocina Fusión: very close to Plaza de Armas, the restaurant has a beautiful atmosphere and is located on the second floor, with a pleasant view to Av. El Sol. More important, the service was good and the alpaca with penne was very good. Click here to open the JJonas Facebook.
- Pizzería La Nostra: despite is so called pizzeria, it has many other dishes and I had a very good steak at a lower price than other good restaurants in Cusco. Click here to open the La Nostra Facebook.
Acclimatization
To acclimatize to the altitude, I spent 3 days in Huaraz, that is 3,000 m (9,850 ft) above sea level, and I did easy hikes on the first two days and a moderate hike on the third day. For me it was enough, but each body reacts in a way and that doesn’t depend on how fit you are. If you already know that you have slower acclimatization, it is recommended to spend the first day in the city.
Day 1: Wilcacocha Lagoon, with a maximum altitude of 3,800 m (12,500 ft). It’s not a pretty lake, but the view of the mountains from Huscarán National Park is beautiful and, more important, it’s an easily accessible place for the first or second day of acclimatization. The van leaves from Av. Antonio Raymondi, almost on the corner with Jr. Hualcan. On Google Maps, search for Colectivo to Laguna Wilcacocha. Click to download the tracklog at Wikiloc.
Day 2: Willkawain Ruins and Radian Lagoon Lookout, with a maximum altitude of 3,900 m (12,800 ft). The ruins are very interesting, but the viewpoint to the lagoon is not so beautiful, it’s worth only for the acclimatization. If you want to get to Radian Lagoon, you have to pay for the peasants, but it is worth mentioning that the lake is not as beautiful as the high-altitude lakes of the Andes. The van leaves from the corner of 13 de Diciembre and Jr. Cajamarca. On Google Maps, search for Paradero Wilcahuain. Click to download the tracklog at Wikiloc.
Day 3: Churup Lagoon, with a maximum altitude of 4,500 m (14,760 ft). The lagoon is beautiful, with crystal clear water and in front of Nevado Churup. The trail to it is quite steep and, if you want to go further, you can go up to Churupita Lagoon. The van leaves from Av. Agustín Gamarra, almost on the corner with Antonio Raymondi. On Google Maps, search for Paradero Pitek, Laguna Churup. Click to download the tracklog at Wikiloc.
Another option is to replace two hikes that I mentioned above with the most famous and beautiful lagoons in the region, but for these you will need to rent a car or book a tour with agencies, as they are far from Huaraz.
Laguna Parón: Among all the places mentioned in this article, this is the one that is easiest to reach, as the van will drop you off at the edge of the lake, at 4,206 meters (13,800 ft) above sea level. But if you’re going to get up early and spend hours on the road to get to Parón, be sure to climb to the most famous viewpoint, via a 1.6 km / 1 mi trail (round trip) and an accumulated elevation of 155 meters (508 ft), reaching up to 4,350 meters (14,271 ft) in altitude. Click to download the tracklog on Wikiloc.
Laguna 69: The trail from the van stop to the edge of the lake is 14 km / 8.7 mi (round trip) and has 860 meters (2,821 ft) of accumulated elevation, reaching 4,627 meters (15,180 ft) of altitude. If you’re feeling good, I recommend going to the viewpoint, increasing the trail by 1 km / 0.6 mi (round trip) and climbing another 96 meters (315 ft), totaling 15 km / 9.3 mi (round trip) with an ascent of 960 meters / 3,150 ft (round trip). If you go with your own car, you will have to leave it in the camping area’s parking lot, so the walk will be 16.7 km / 10.4 mi (round trip) with an accumulated elevation of 1,018 meters (3,340 ft). Click to download the tracklog on Wikiloc.
Starting point and how to get there
Regarding the physical effort, it is a little easier to start in Upis and finish in Pacchanta, as you don’t start the circuit with a long climb just when the backpack is heavier because of the food. But the difference is not that much, the biggest reason to start in Upis is for the transport logistics, since it is much easier to get back from Tinke, that is a village with lodging and restaurants, that from Upis, which it’s just a campsite where you can’t find transport.
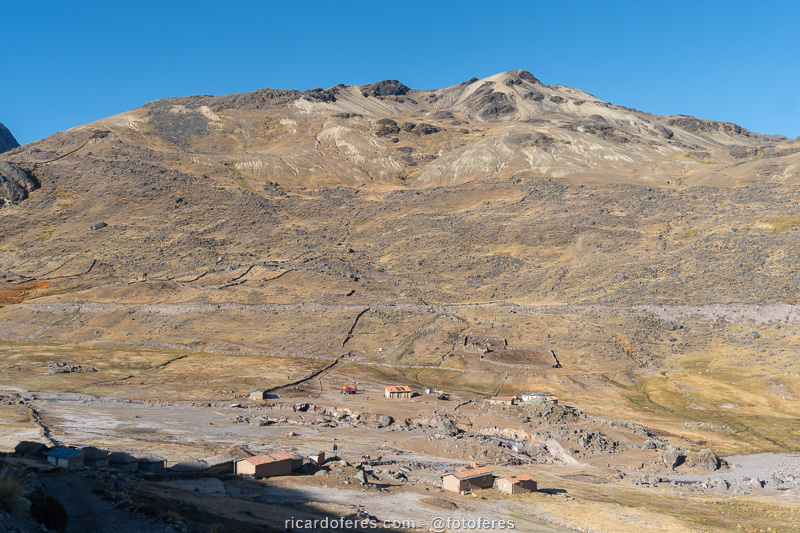
Being in Cusco, you must first take a bus to Tinke (on some maps the spelling is wrong, marking Tinki) on Av. Tomasa Ttito Condemayta, in front of Coliseo Cerrado/Casa de la Juventud. On Google Maps, look for Paradero Ocongate. When arriving in Tinke, you need to hire a motorcycle-taxi to Campamento Upis, you can find them very close to the central square, just ask, everybody knows. As the road is full of potholes, cars don’t go all the way to the end of the dirt road, only motorcycles, and make it clear that you want to go to CAMPAMENTO Upis, not PUEBLO Upis. If you look like a foreigner, they’ll charge you 50 or 60 soles for the ride. If you look like a Peruvian, they’ll charge you 20 soles, it’s the unofficial “tax” to travel through Peru, unfortunately.
When you finish the trail in Pacchanta, you can stay there to relax in the thermal waters or you can look for a van that has taken tourists on the circuit of the lagoons and to the hot springs. If you can’t find a van, you can return by taxi or moto-taxi, but the van is a better option as it takes you straight to Cusco, avoiding taking the bus in Tinke.
Fees
Cordillera Vilcanota does not belong to any protected area, but at certain points the locals charge fees to camp or just to cross. As this circuit is much less hiked than Huayhuash, it is not always that there are people charging. When I did the hike, only at Laguna Huayhuash I had to pay 10 soles to pass, and if I had slept there, it would be 20 soles. At other points, such as Comunidad de Upis and Águas Termales de Upis, there was no one to charge, but bring cash in case you need to pay all the fees.
Guide
It is not mandatory to hire a guide to do the trails in Ausangate, but it is recommended if you are not an experienced hiker. I did it by myself, but if you want to hire one, talk to Fredi Cruz Lumbe, phone/WhatsApp +51 942 667 102. His Facebook is fredi.lumbe.31 and Instagram is fredy_lumbe.
Tracklog to the GPS
Itinerary
Below is the itinerary I made, with one change to make it more interesting: instead of heading to Pampacancha Campsite, after Paso Palomani I went to 4900 Lagoon, slept on its shore and walked until arriving at the traditional trail the next day.
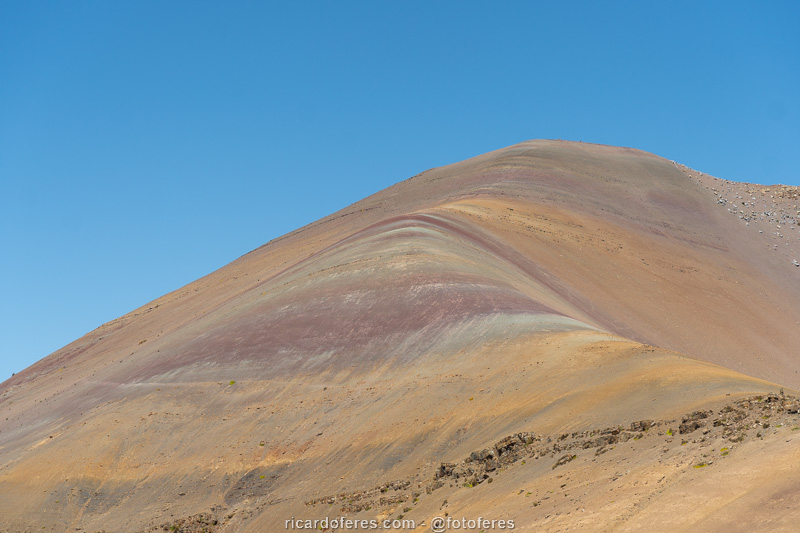
If you have the time and will, it is possible to detour to the Rainbow Mountain, one of the most famous tourist spots in the region, making the circuit two days longer.
Day 1: Upis – Pucacocha Campsite
Distance: 12.5 km (7.7 mi)
Accumulated ascent: 553 m (1,814 ft)
Accumulated descent: 398 m (1,305 ft)
Minimum altitude: 4,434 m (14,547 ft)
Maximum altitude: 4,735 m (15,534 ft)
Right at the beginning there is Upis Campsite and its hot springs, so if you like hot springs, you can come the day before, take a bath and spend the night.
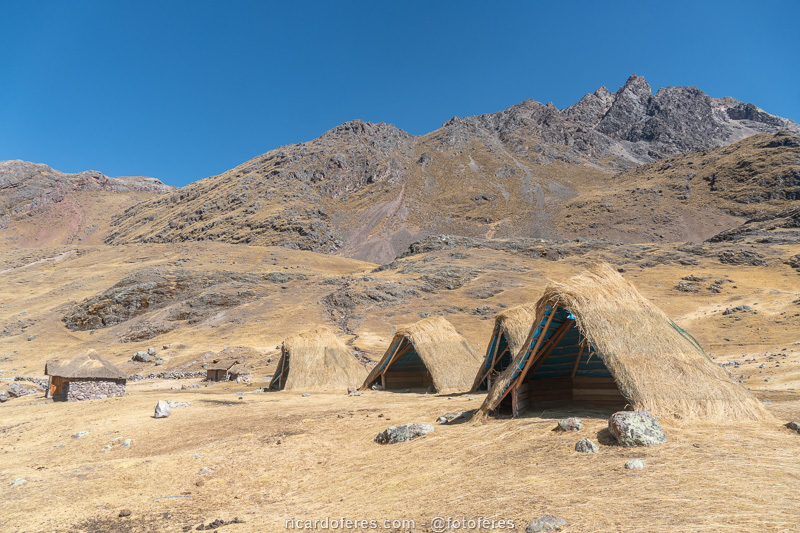
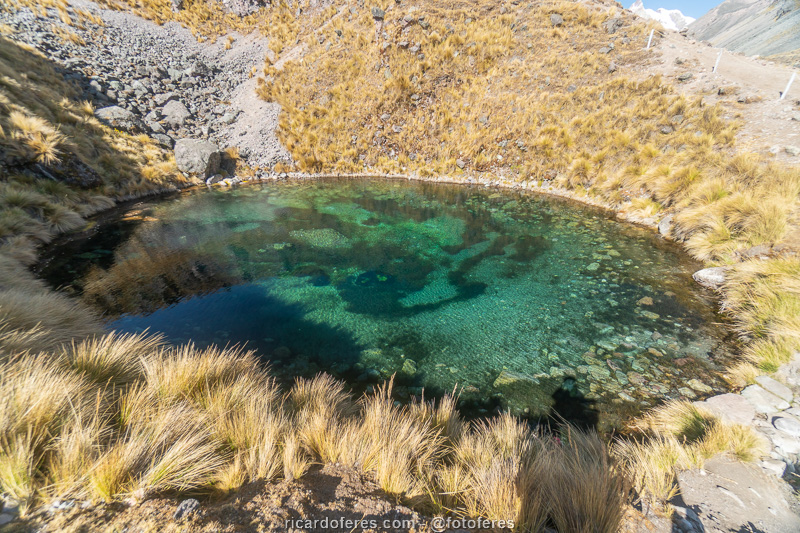
Only 1.5 km after the start there is a side trail that leads to Upis Lagoon, which is usually frozen in the early morning. Then there is a long but not steep climb. It’s not an exhausting day and it’s even possible to move on, but Pucacocha Lagoon camping area is so good that I recommend you sleep there.
Day 2: Pucacocha Campsite – 4900 Lagoon
Distance: 12.2 km (7.6 mi)
Accumulated ascent: 872 m (2,860 ft)
Accumulated descent: 635 m (2,083 ft)
Minimum altitude: 4,597 m (15,082 ft)
Maximum altitude: 5,092 m (16,706 ft)
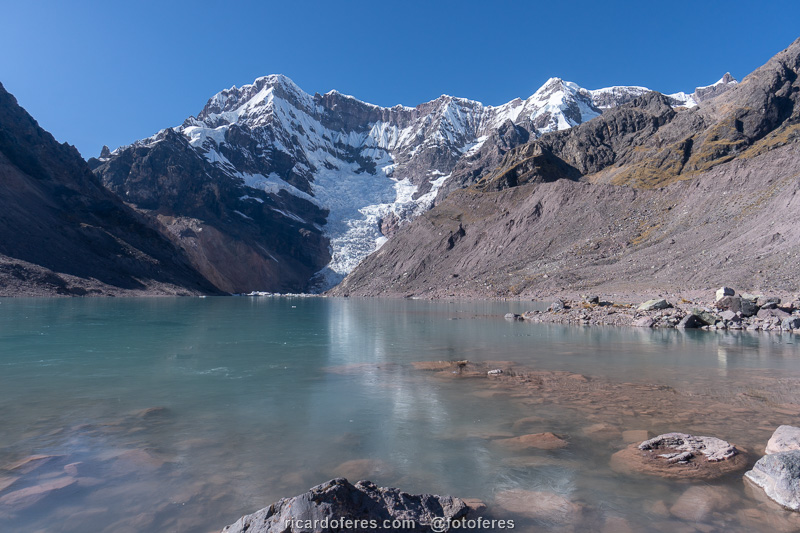
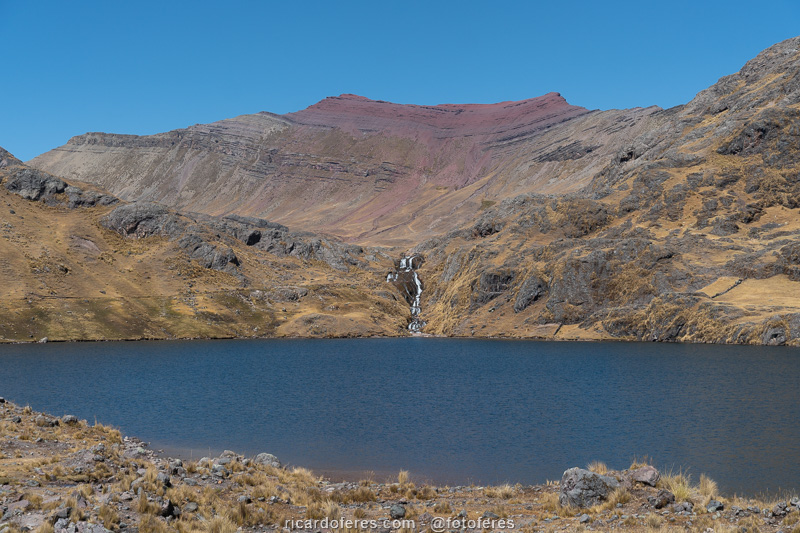
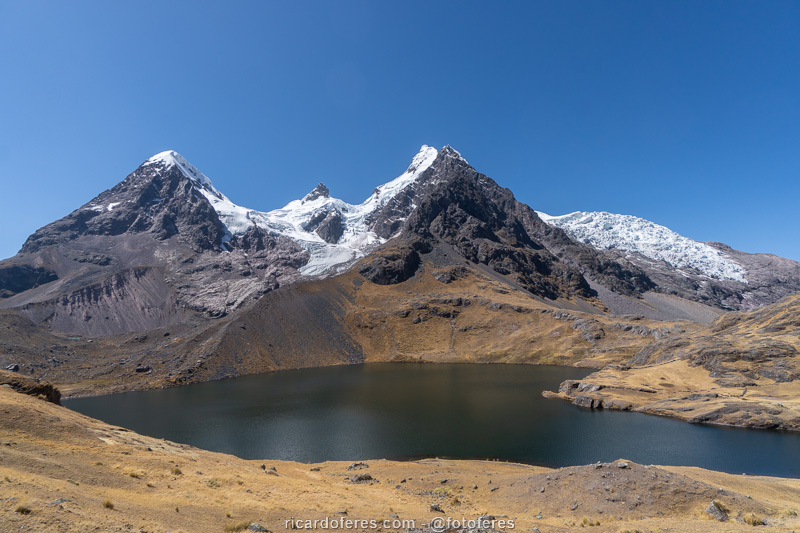
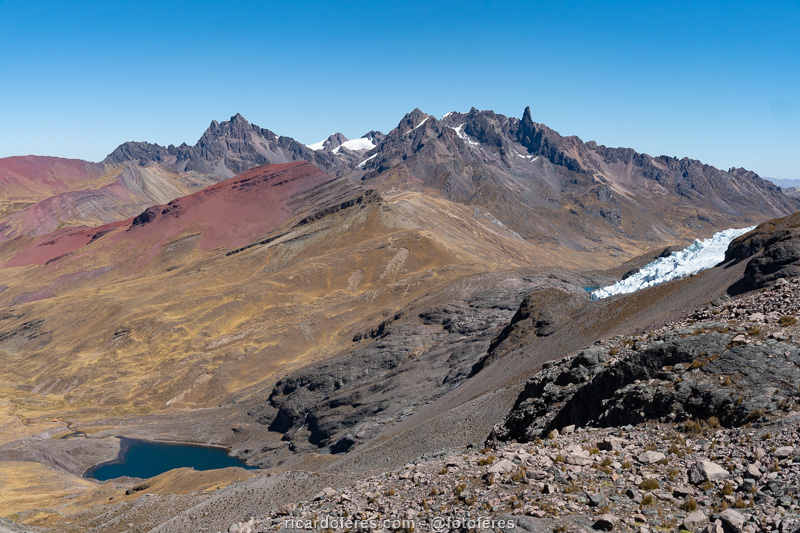
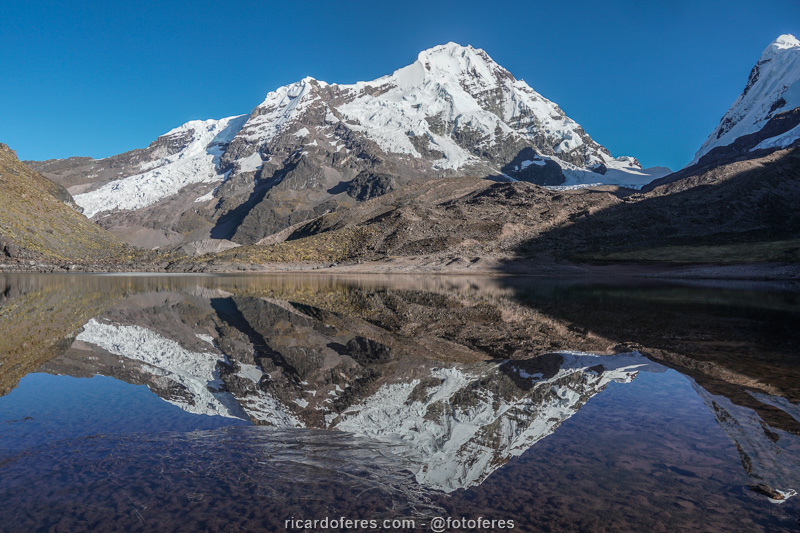
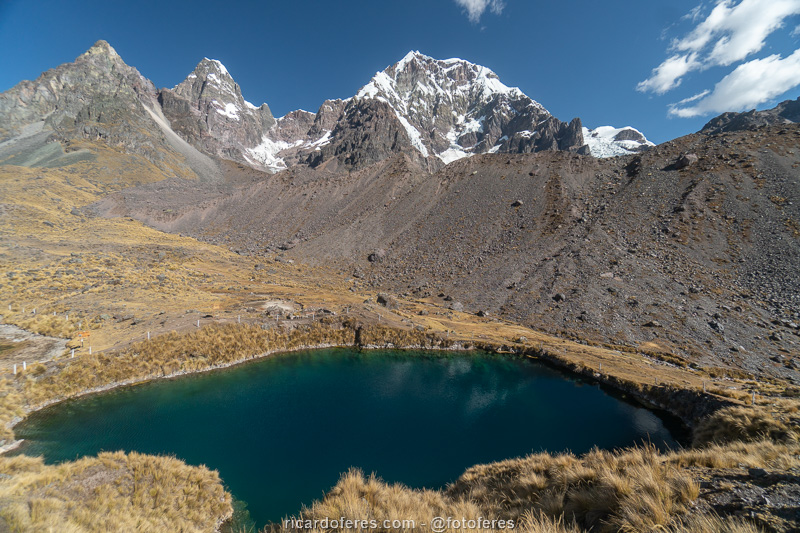
Despite having the name of the circuit, Ausangate Lagoon doesn’t stand out more than the others and, in my opinion, is less beautiful than several other lagoons of the circuit, so don’t go there thinking you’ll be in a more beautiful place than Pucacocha Lagoon. The campsite has restrooms, but I think it’s better to go ahead and face the worst climb of the circuit, which leads to Paso (Abra) Palomani. Despite being the most difficult climb, it is not very demanding, this circuit does not have really challenging climbs.
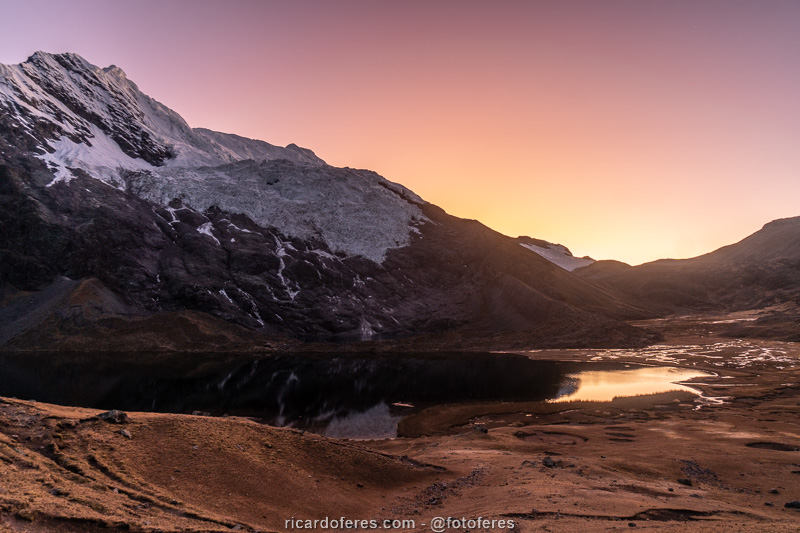
When you are in Paso Palomani, if you follow the well-marked trail, you will reach the valley and the Pampacancha camping area, but if you want to do wild camping and sleep in a much higher place, head to Laguna 4900, but only do it if you have a good sleeping bag, as I got minus 10 degrees Celsius (14 Fahrenheit) at this point, which is almost 5,000 meters (16,076 ft) above sea level.

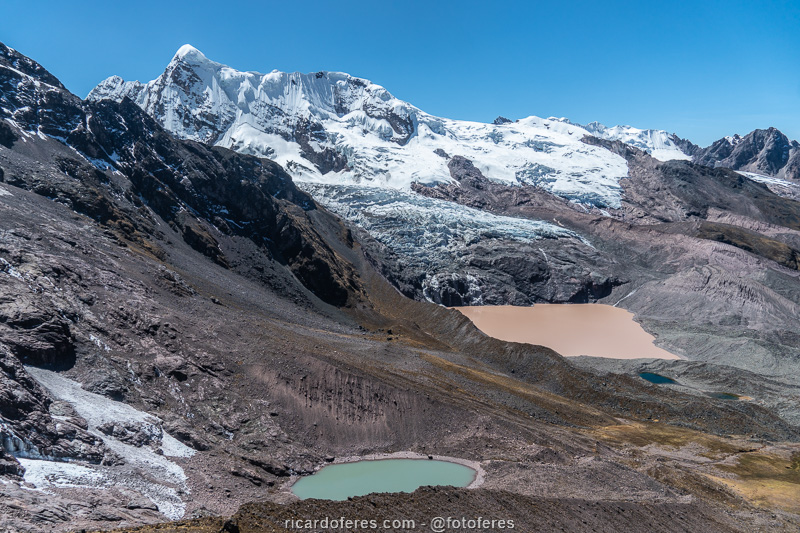
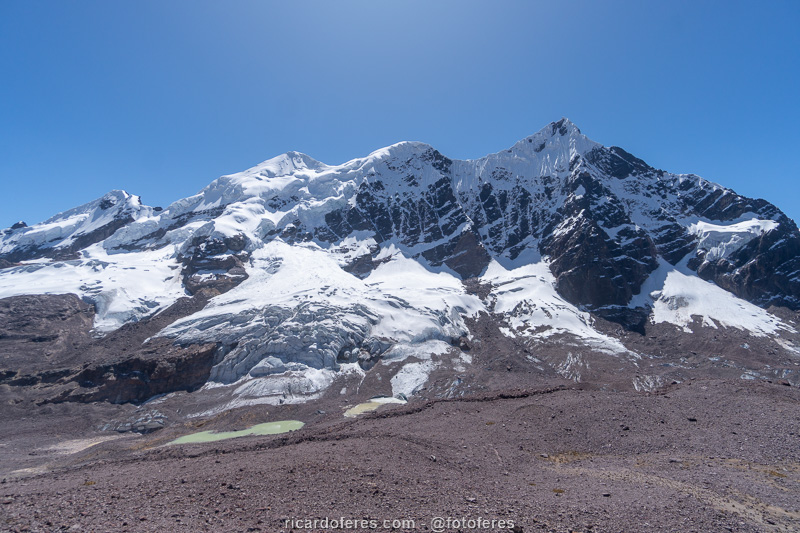
Click to open a 360 degree photo taken on Paso Palomani, at 5,085 meters (16,683 ft) above sea level, with view to Ausangate Lagoon, Nevado Ausangate, Nevado Mariposa and Machuracay Valley

Click to open a 360 degree photo taken in Machuracay Valley, with view to Nevados Ausangate and Mariposa

Day 3: 4900 Lagoon – Otorongo Campsite
Distance: 15.3 km (9.5 mi)
Accumulated ascent: 535 m (1,755 ft)
Accumulated descent: 735 m (2,411 ft)
Minimum altitude: 4,613 m (15,134 ft)
Maximum altitude: 5,078 m (16,660 ft)
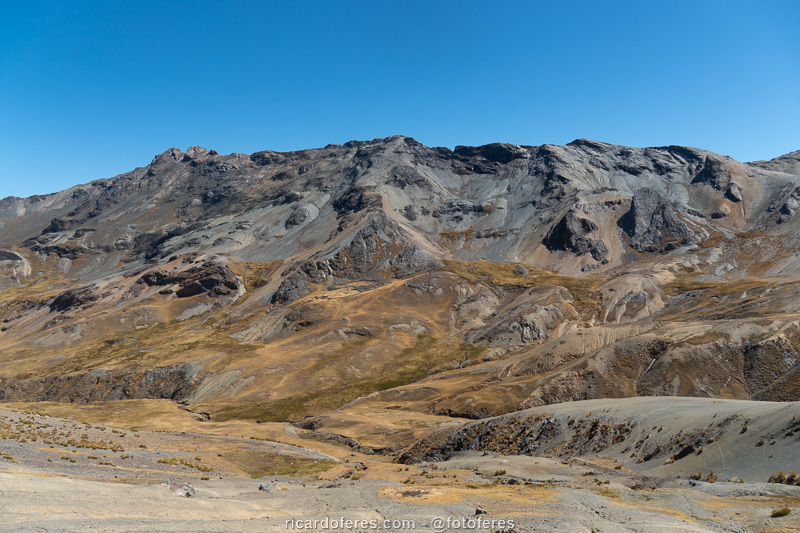
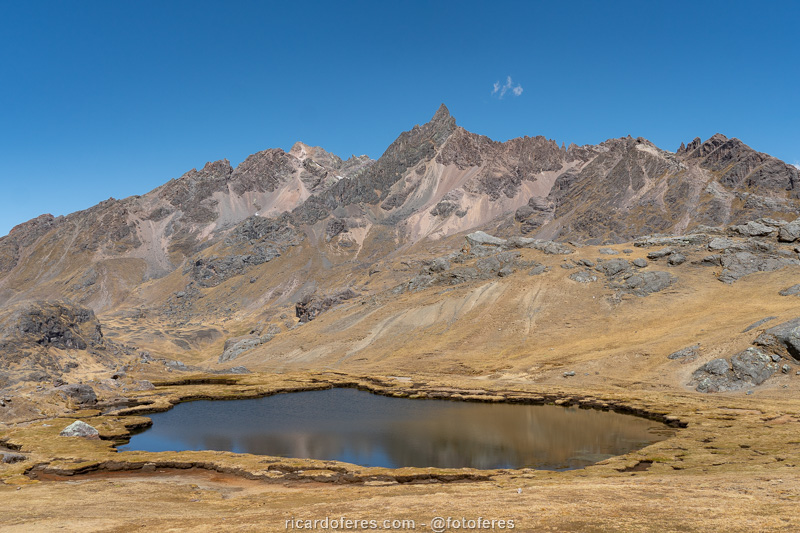
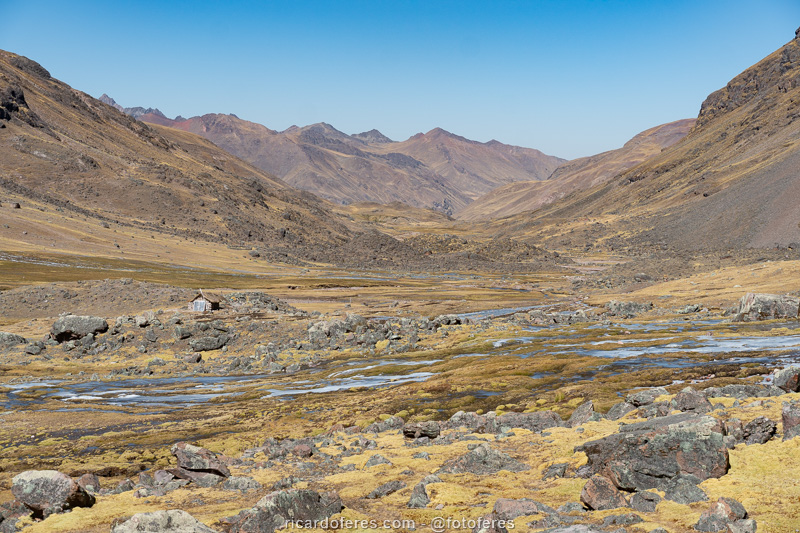
After a long descent you will reach a valley where you will find the traditional trail again. After walking a few kilometers through the valley, you will have the only climb of the day, which leads to Paso (Abra) Khampa, which is beautiful but not as beautiful as Paso Palomani. This was the last ascent of the circuit and it’s up to you to decide where you will camp or go straight to Pacchanta, a long but easy walk, as you’ll always walk on flat ground or in downhills. There are 3 good camping spots:
-Jhampa,that doesn’t have a beautiful lake close by;
-Otorongo, with beautiful lakes around;
-Azulcocha, next to the lagoon and the last official camping spot.


Day 4: Otorongo Campsite – Pacchanta
Distance: 7.3 km (4.5 mi)
Accumulated ascent: 68 m (223 ft)
Accumulated descent: 350 m (1,148 ft)
Minimum altitude: 4,380 m (14,370 ft)
Maximum altitude: 4,674 m (15,334 ft)
The last day is very easy, with short distance and no climbs, so you can take the chance to visit all the lagoons in the region and you will still have time to visit the hot springs in Pacchanta before looking for a van or taxi to take you back to Cusco.
There are two paths that go down to Pacchanta, take the one that passes through the Uturunku lagoons, which are very beautiful.
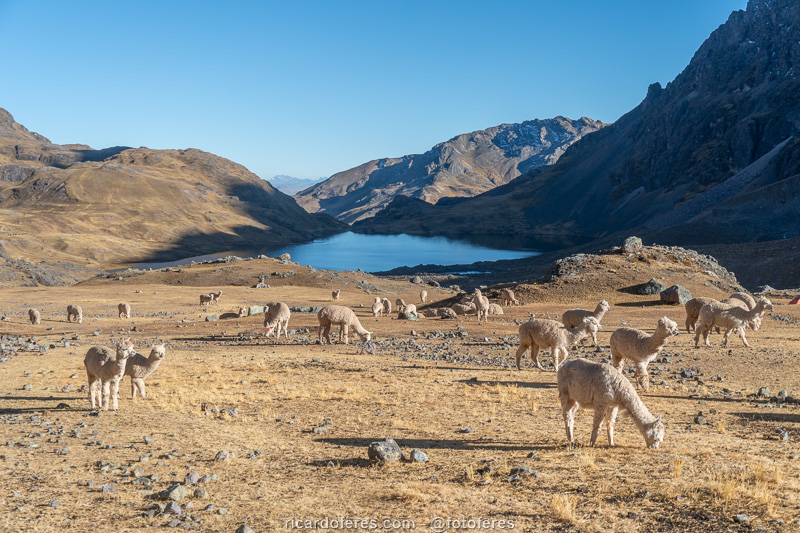
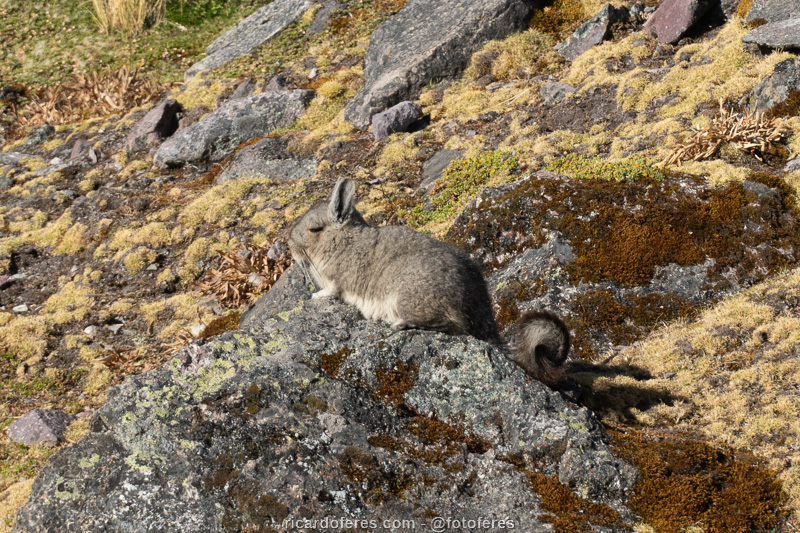
Keep an eye out for vizcachas, a very skittish and fast rodent that looks like a rabbit but has a very long tail..

Get to know the photo book "The Most Beautiful Trails of Patagonia"
Torres del Paine, El Chaltén, Bariloche, Ushuaia, Villarrica, Cerro Castillo, Dientes de Navarino and Parque Patagonia