Get to know the photo book "The Most Beautiful Trails of Patagonia"
Torres del Paine, El Chaltén, Bariloche, Ushuaia, Villarrica, Cerro Castillo, Dientes de Navarino and Parque Patagonia
Alpamayo Circuit, Cordillera Blanca, Peru – Itinerary and tips

Alpamayo Circuit map, with the trails split in 8 days, totaling 128 km (80 mi) of distance and 7,631 m (25,039 ft) of accumulated ascent.
Best season
From May to September is the dry season, with July and August being the coldest months. During this period, rainy days are rare, but you have to be prepared for the worst possible weather, as it can always happen. During the fifty days I spent in the Peruvian mountains during the winter of 2022, it only rained and snowed for some hours in one day.
Description
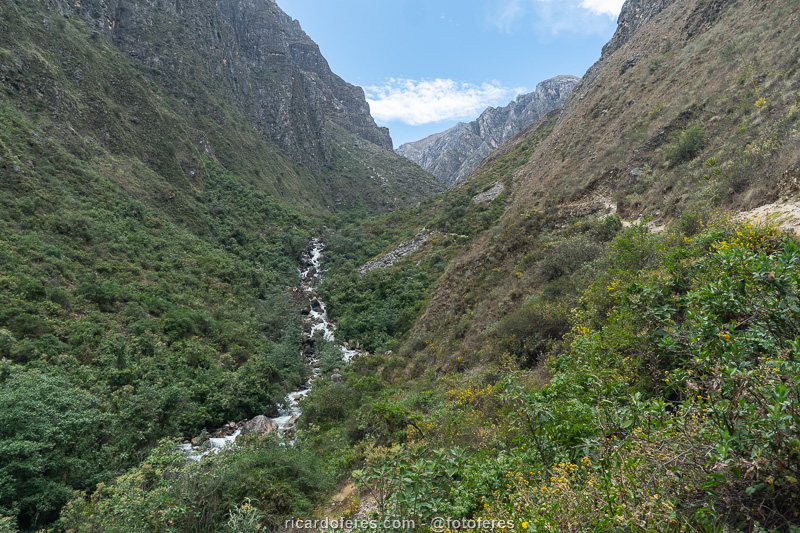
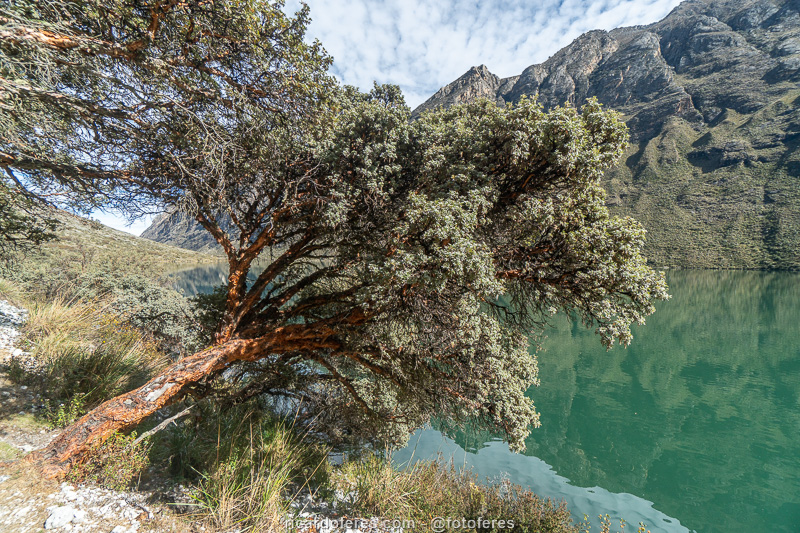
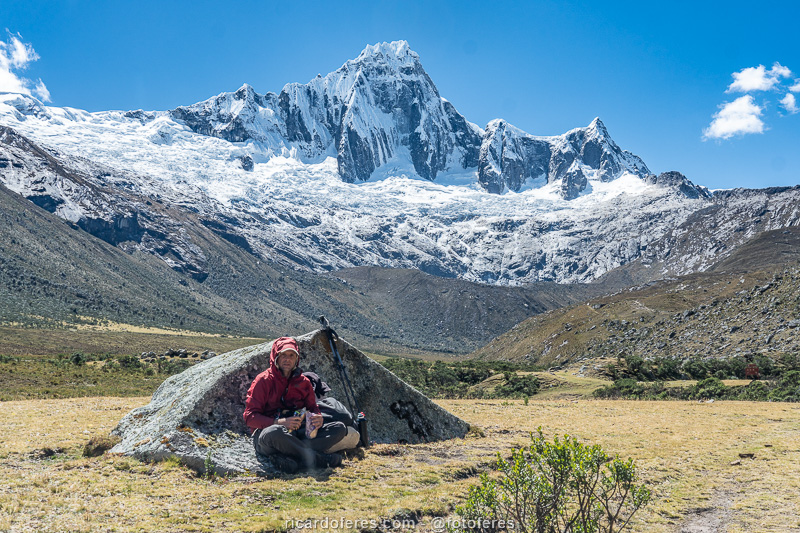
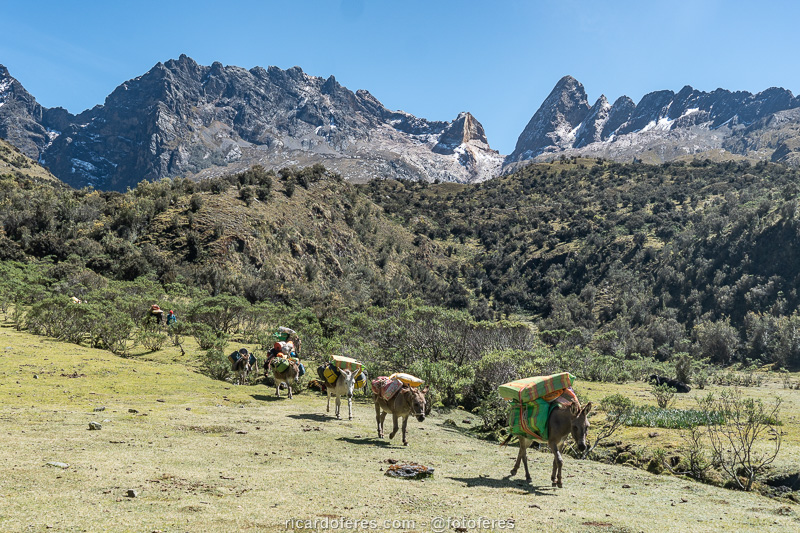
The Alpamayo Circuit is in Huascarán National Park, in the Cordillera Blanca, which is part of the Andean Range. This circuit is the combination of two trails, the famous Santa Cruz Trek and Valle Los Cedros Trek. Santa Cruz trail is one of the most famous in Peru and you will find many groups of hikers and climbers, while the trail that runs through Valle Los Cedros is little used and there is a good chance of being alone for days.
The trails are almost always above 4,000 m (13,100 ft), the highest point being Paso Caracara, with 4,816 m (15,800 ft), so it is necessary to do a good acclimatization before this hike.
During the day, when there is no wind and clouds, the temperature is high enough to walk around in a t-shirt and shorts, but as soon as the sun goes down, the temperature drops quickly and, at night, the minimums are almost always below freezing point. When I did the circuit, the minimums were between 0 ºC and -6 ºC (32 ºF and 21 ºF), but be prepared to face even lower temperatures, in case of a cold front.
Base city
Huaraz is the largest city in the region and it’s full of mountaineers in winter, which is the high season, but the prices of accommodation and restaurants are affordable. Plus, there are stores that sell hiking and climbing gear, in case you have any problems with your equipment.
Where to sleep: I stayed at Lhotse Hostel and slept both in the room with a single bed and in the room with a double bed. The single room is small and doesn’t have a window, which bothered me, but the double room has plenty of space and a window that doesn’t offer a view, but at least serves to ventilate. The shower worked well and the bed was good, as was the wifi. Breakfast is served with two breads, one jam, butter, tea, coffee, eggs and one fruit, which varies each day, and the view from the breakfast terrace is beautiful, as you have a 360-degree view to the mountains. The hostel is in the south of Huaraz, not far from Plaza de Armas and restaurants, but the departure points for vans and buses are generally further north of the city. To summarize, there is no luxury, but it’s a good value for money.
Where to eat: I’ve been in twelve restaurants and, among these, the three that stood out are listed below. It is worth mentioning that I did not ask and I did not have any kind of discount, both for accommodation and for the restaurants, I am recommending them on their merit.
- Jama Restaurante: I’ve been there twice. In the first one, I ordered the trout with creamy quinoa and it was fantastic! It was so good that, when I went again, I couldn’t try another dish and I ate it once more. In fact, this trout was the best dish of the entire trip, not just from Huaraz. They does not open for lunch and it is recommended to make a reservation for dinner, as there are few tables and it is usually full. Click to open Jama Facebook.
- Mamma Mia: from noon to 15:00, the restaurant has executive dishes at very good prices (12 to 15 soles). The executives are not as well served as the dishes on the main menu, but the taste is great, not bad for being so cheap. They also sell homemade bread and pastries, and are located in Parque Ginebra, a square that has several restaurants, so don’t be shy about asking everyone’s menu to see what you like best. Click to open Mamma Mia Facebook.
- Chicharronería San Francisco: this is not a tourist restaurant, and in both times I’ve been there, I was the only foreigner. The atmosphere is simple, it’s a little away from Plaza de Armas, but their chicharrón de chancho is delicious, much better than the others I’ve had in Peru. If you’re not familiar with chicharrón de chancho, it’s pork fried in the pork’s own fat, a dish that’s not light but excellent for those looking to regain weight lost in the mountains. Click to open Chicharronería San Francisco Facebook.
Acclimatization
To acclimatize to the altitude, I spent 3 days in Huaraz, that is 3,000 m (9,850 ft) above sea level, and I did easy hikes on the first two days and a moderate hike on the third day. For me it was enough, but each body reacts in a way and that doesn’t depend on how fit you are. If you already know that you have slower acclimatization, it is recommended to spend the first day in the city.
Day 1: Wilcacocha Lagoon, with a maximum altitude of 3,800 m (12,500 ft). It’s not a pretty lake, but the view of the mountains from Huscarán National Park is beautiful and, more important, it’s an easily accessible place for the first or second day of acclimatization. The van leaves from Av. Antonio Raymondi, almost on the corner with Jr. Hualcan. On Google Maps, search for Colectivo to Laguna Wilcacocha. Click to download the tracklog at Wikiloc.
Day 2: Willkawain Ruins and Radian Lagoon Lookout, with a maximum altitude of 3,900 m (12,800 ft). The ruins are very interesting, but the viewpoint to the lagoon is not so beautiful, it’s worth only for the acclimatization. If you want to get to Radian Lagoon, you have to pay for the peasants, but it is worth mentioning that the lake is not as beautiful as the high-altitude lakes of the Andes. The van leaves from the corner of 13 de Diciembre and Jr. Cajamarca. On Google Maps, search for Paradero Wilcahuain. Click to download the tracklog at Wikiloc.
Day 3: Churup Lagoon, with a maximum altitude of 4,500 m (14,760 ft). The lagoon is beautiful, with crystal clear water and in front of Nevado Churup. The trail to it is quite steep and, if you want to go further, you can go up to Churupita Lagoon. The van leaves from Av. Agustín Gamarra, almost on the corner with Antonio Raymondi. On Google Maps, search for Paradero Pitek, Laguna Churup. Click to download the tracklog at Wikiloc.
Another option is to replace two hikes that I mentioned above with the most famous and beautiful lagoons in the region, but for these you will need to rent a car or book a tour with agencies, as they are far from Huaraz.
Laguna Parón: Among all the places mentioned in this article, this is the one that is easiest to reach, as the van will drop you off at the edge of the lake, at 4,206 meters (13,800 ft) above sea level. But if you’re going to get up early and spend hours on the road to get to Parón, be sure to climb to the most famous viewpoint, via a 1.6 km / 1 mi trail (round trip) and an accumulated elevation of 155 meters (508 ft), reaching up to 4,350 meters (14,271 ft) in altitude. Click to download the tracklog on Wikiloc.
Laguna 69: The trail from the van stop to the edge of the lake is 14 km / 8.7 mi (round trip) and has 860 meters (2,821 ft) of accumulated elevation, reaching 4,627 meters (15,180 ft) of altitude. If you’re feeling good, I recommend going to the viewpoint, increasing the trail by 1 km / 0.6 mi (round trip) and climbing another 96 meters (315 ft), totaling 15 km / 9.3 mi (round trip) with an ascent of 960 meters / 3,150 ft (round trip). If you go with your own car, you will have to leave it in the camping area’s parking lot, so the walk will be 16.7 km / 10.4 mi (round trip) with an accumulated elevation of 1,018 meters (3,340 ft). Click to download the tracklog on Wikiloc.
Starting point and how to get there
This circuit can be done starting in Cashapampa or Hualcayan. If you start in Cashapampa, you will end up in Hualcayan, and vice versa.
Advantage of starting in Cashapampa: the climb on the first day won’t be so steep. To get to Cashapampa you need to take a van from Huaraz to Caraz and another van from Caraz to Cashapampa. You can find the van that goes to Caraz at 13 de Diciembre, very close to Av. Agustín Gamarra. Look for “Paradero Caraz” on Google Maps to see the location. I recommend going the day before to this van stop to check the schedule. Arriving in Caraz, ask where the Colectivo to Cashapampa leaves from, it is a short walk and you won’t need a taxi.
Advantage of starting in Hualcayan: when you finish the circuit, you can take a van to go back to Caraz and, from there, another van to Huaraz. You can find the van that goes to Caraz at 13 de Diciembre, very close to Av. Agustín Gamarra. Look for “Paradero Caraz” on Google Maps to see the location. I recommend going the day before to this van stop to check the schedule. Right in front of the van stop in Caraz you will find taxis, negotiate with some to find the best deal, otherwise you will pay a lot.
I chose to start in Cashapampa, as I was not very well trained to take a very steep climb on the first day, with a backpack full of food for 10 days. When I finished the circuit, I found a resident who took me back to Caraz for 100 soles, which was a great price, as a taxi charges 150 to 200 soles.
Fees
As this circuit is inside Huascarán National Park, it is necessary to pay a fee, that is charged for how many days one stay in the park:
1 day = 30 soles;
2 or 3 days = 60 soles;
4 to 30 days = 150 soles.
If you do the trail to Churup Lagoon as part of your acclimatization, you will have to buy the ticket this day, so already buy it for 30 days and you won’t have to pay the 1-day fee and then the 30-day fee. Tickets can be purchased in Huaraz or at Churup Lagoon checkpoint.
Guide
It is not mandatory to hire a guide to do the trails in Huascarán National Park, but it is recommended if you are not an experienced hiker, especially for Valle Los Cedros, when it is rare to find other hikers. I did it by myself, but if you want to hire a guide, talk to Fredi Cruz Lumbe, telephone/WhatsApp +51 942 667 102, Facebook fredi.lumbe.31 and Instagram fredy_lumbe.
Tracklog to the GPS
Itinerary
Below is the route I made, but as there are several other camping spots, it is not necessary to follow the same route as me, it all depends on how much you want to walk each day.
Day 1: Cashapampa – Llamacorral Campsite
Distance: 9.6 km (6 mi)
Accumulated ascent: 864 m (2,834 ft)
Accumulated descent: 135 m (443 ft)
Minimum altitude: 2,894 m (9,494 ft)
Maximum altitude: 3,761 m (12,339 ft)
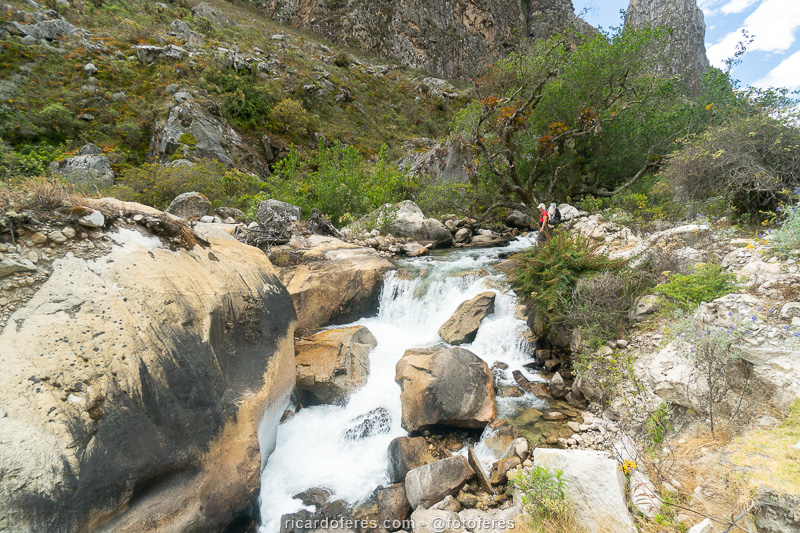
During the first 5 km (3 mi) the trail is a little steep, but then the trail has only a slight climb to Llamacorral Campsite. If you’re feeling well, you can go ahead as there are more camping spots before the climb to Alpamayo Base Camp.
The camp has latrine-style toilets.

Click to open a 360 degree photo taken at the lookout of Arhuaycocha Lagoon, with views to Alpamayo and Artesonraju.
Day 2: Llamacorral Campsite – Alpamayo Sur Base Camp
Distance: 17.4 km (including the trail to Arhuaycocha Lagoon, which is a must see)
Accumulated ascent: 829 m (2,719 ft)
Accumulated descent: 234 m (767 ft)
Minimum altitude: 3,685 m (12,090 ft)
Maximum altitude: 4,421 m (14,504 ft)
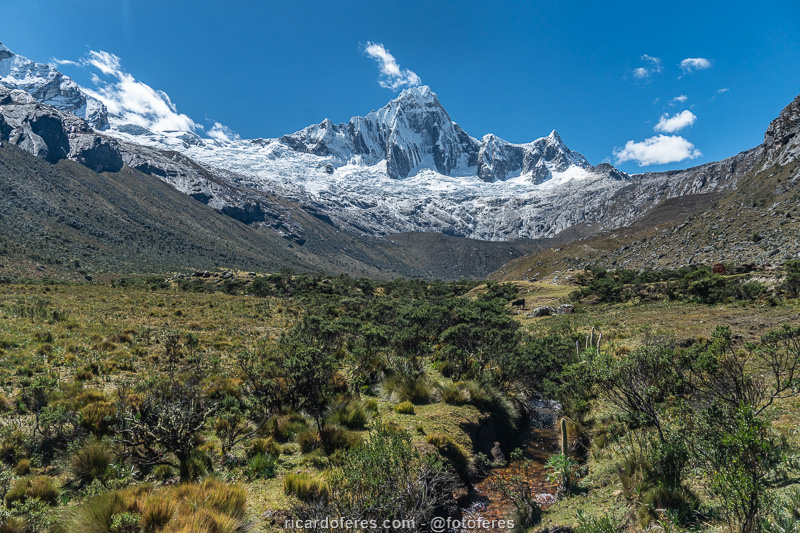
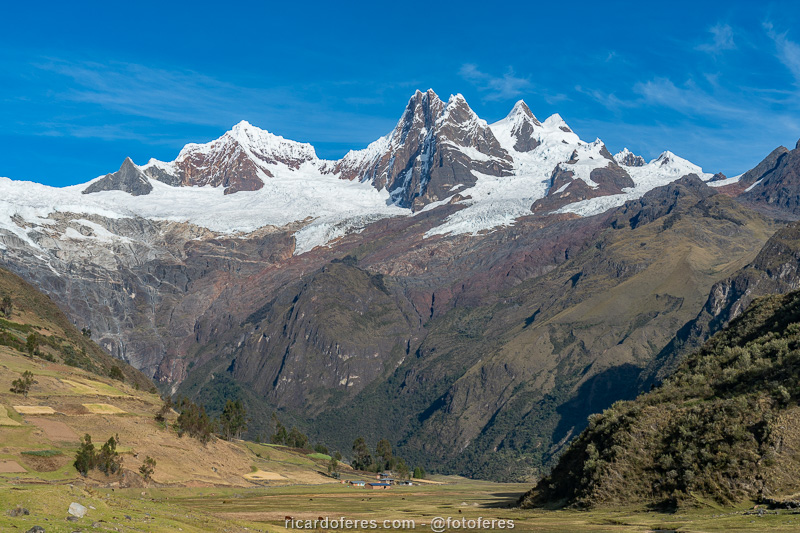
The trail goes mostly flat until the climb to base camp, which is quite steep and the altitude make it look worse. When you finish the climb, you will see the Alpamayo on one side and the Artesonraju on the other, it is a spectacular sight.
Pitch your tent at the base camp and head to Arhuaycocha Lagoon, but don’t go to its shore. Just before reaching the lake, go up the hill on your left side, from there the view is much more beautiful, as you can see in these photos.
At the base camp there are latrine-style toilets and it is possible to buy beer and soft drinks.
Day 3: Alpamayo Sur Base Camp – Tuctupampa Campsite
Distance: 13.3 km (8.3 mi)
Accumulated ascent: 656 m (2,152 ft)
Accumulated descent: 758 m (2,487 ft)
Maximum altitude: 4,712 m (15,459 ft)
Minimum altitude: 4,095 m (13,435 ft)
The trail starts going back on the path of the previous day, but only part of the descent is made, as it is possible to take a trail to the left (west) instead of going down to the valley to go west, shortening a little the trail.
The guide Fredi Cruz Lumbe recommended to I sleep at Taullipampa Campsite, which is in a beautiful place, but I thought it was better to go ahead as I arrived at the camp very early and the hiking day would have been too short. If you are doing the Santa Cruz Trek, which is shorter than the full Alpamayo Circuit, it may be worth spending the afternoon at this place.
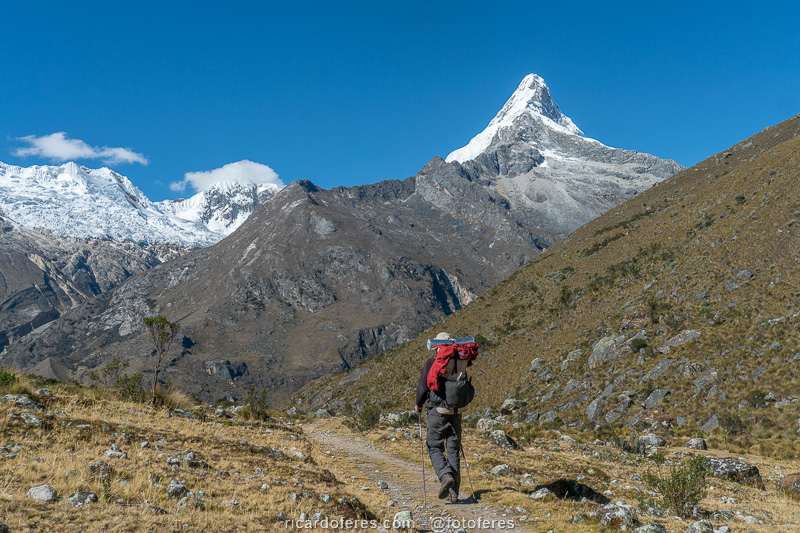
Shortly after starts the steep ascent of Paso Punta Unión, always with beautiful views of Nevado Tauliraju. The other side of the Paso does not have such impressive views, the descent is steep and at certain points there may be ice on the trail, so be careful not to slip.
Tuctupampa Campsite is no longer part of the Santa Cruz Trek and has no structure, so you will probably be alone here.
Day 4: Tuctupampa Campsite – Jancapampa
Distance: 20.6 km (12.8 mi)
Accumulated ascent: 1,002 m (3,287 ft)
Accumulated descent: 1,585 m (5,200 ft)
Minimum altitude: 3,549 m (11,643 ft)
Maximum altitude: 4,562 m (14,967 ft)
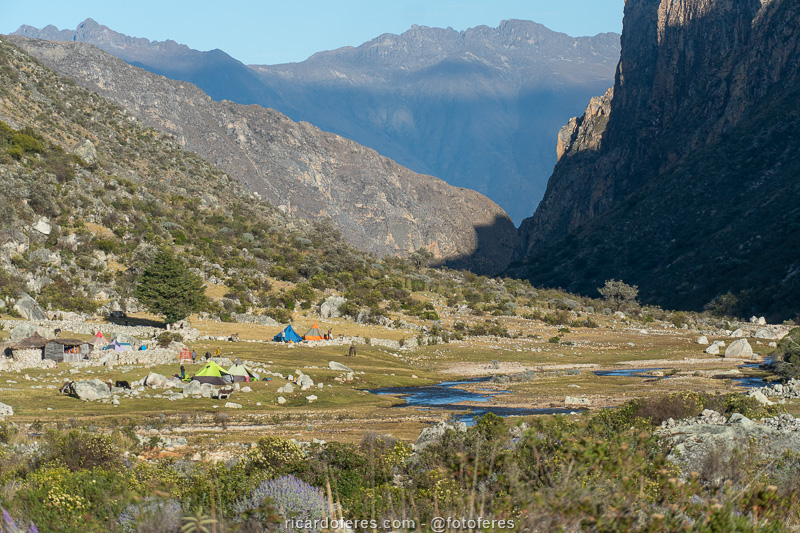
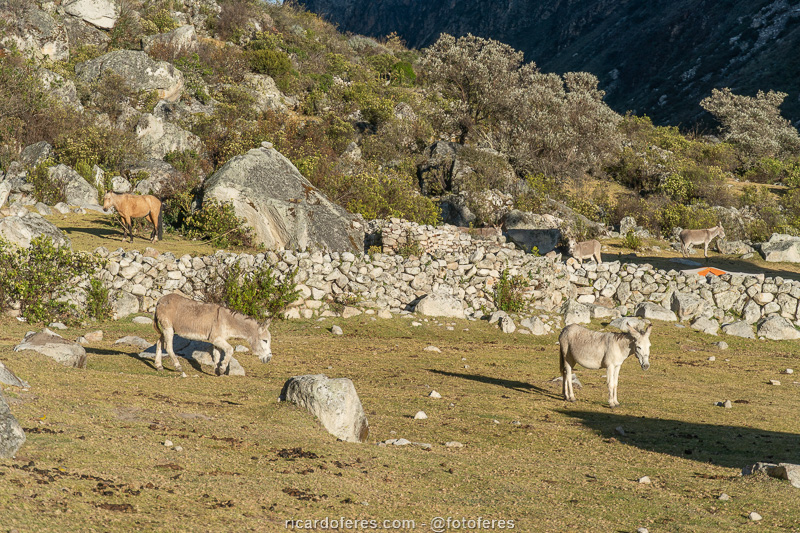
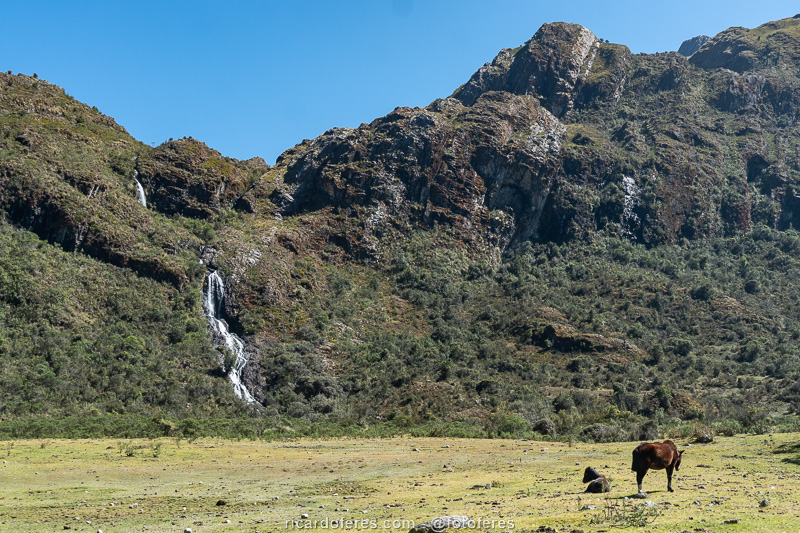
The fourth day has two passes to cross and the most beautiful view of the day is on the descent from Alto de Pucaraju, the frist pass. After that, the view is less interesting until you reach the village of Jancapampa, which has a small grocery store that sells cookies, pasta and some basic items like toilet paper. The grocer also has two very simple rooms for rent, but if you prefer to camp, you need to follow the trail for a few kilometers to get away from the city and find a good spot. To get to the grocery store, just ask where is the “tienda”, everyone knows where it is.
Day 5: Jancapampa – Huillca Campsite
Distance: 15.1 km (9,4 mi)
Accumulated ascent: 1,144 m (3,753 ft)
Accumulated descent: 650 m (2,132 ft)
Minimum altitude: 3,527 m (11,571 ft)
Maximum altitude: 4,589 m (15,055 ft)
As soon as you leave Jancapampa you will find the most beautiful landscape of the day, just before a long climb.
Huillca Campsite has no structure and is close to a house and a stream. If you want, you can go ahead and camp by the trail, but you won’t be too close to a water source.
Day 6: Huillca Campsite – Jancarurish Campsite
Distance: 13.4 km (8.3 mi)
Accumulated ascent: 917 m (3,008 ft)
Accumulated descent: 729 m (2,391 ft)
Minimum altitude: 4,018 m (13,182 ft)
Maximum altitude: 4,816 m (15,800 ft)
As on the third day, today you will be above 4,000 m (13,000 ft) all the time, but now your acclimatization will be much and you will probably feel a little less the altitude, which is good because on this and the next day, the Pasos will be higher than 4,800 m (15,700 ft).
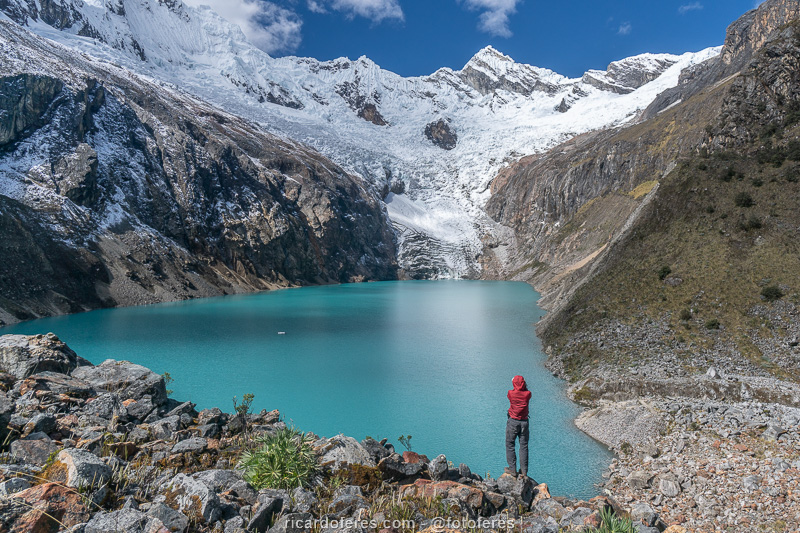
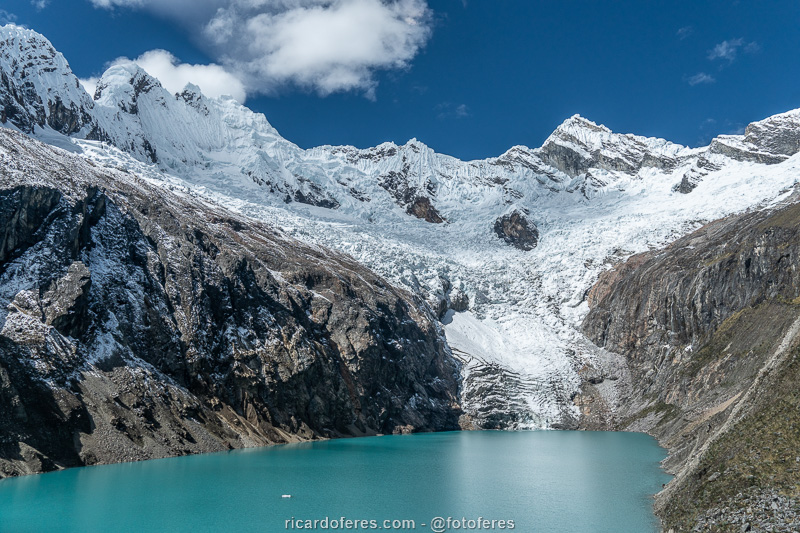
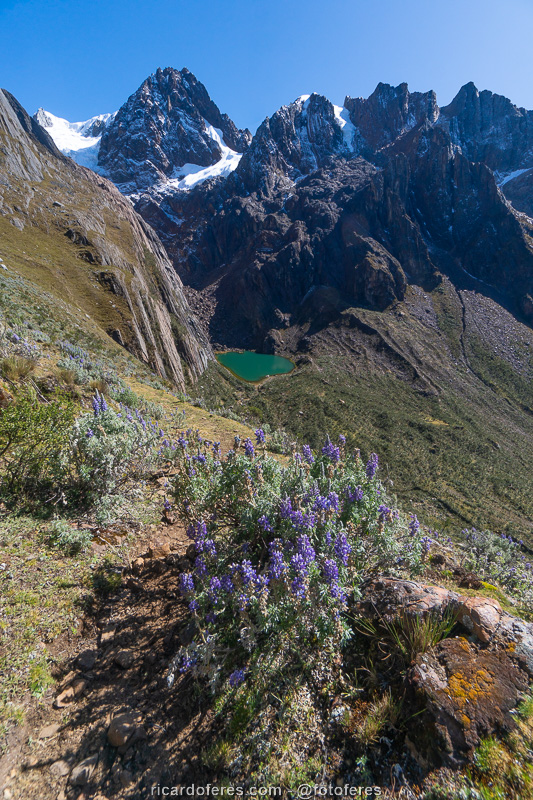
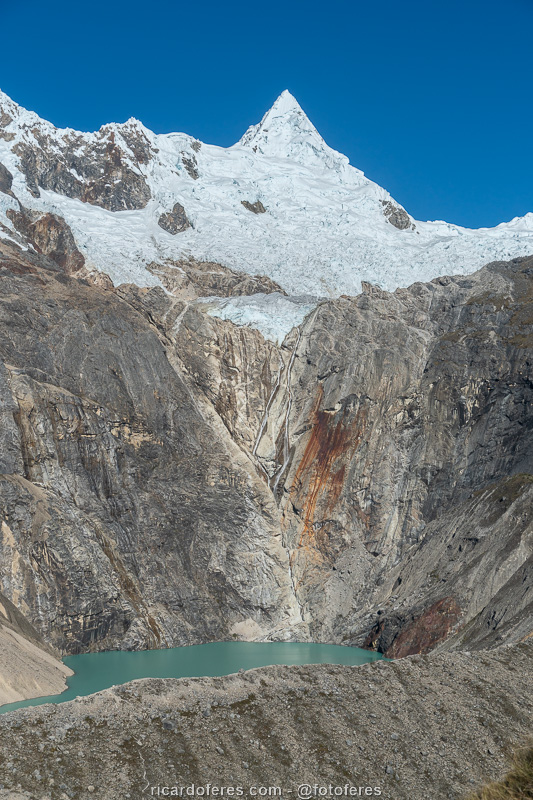
On the descent from Paso Caracara to Jancarurish Campsite, you will already have views, even if partial, of Jancarurish Lagoon and Alpamayo. When you arrive at the campsite, which has no structure, you can take a day trip to the base of the lagoon or go up the hill to the right of the camp. If you go to the base of the lagoon, you will have a photo with more emphasis on it and with the Alpamayo seen from below. If you go up the hill, the lagoon will not be as prominent, but the Alpamayo will be seen from a higher point of view, which is what I chose. It is worth mentioning that there is no trail on this hill, but as the vegetation is low, it is easy to choose a good path.
It is also possible to spend two nights here to do a day trip to Alpamayo Norte Base Camp and to climb a Paso to get even higher and closer view to Alpamayo. I intended to do this, but I felt too bad due to COVID-19 and had to abandon this idea, but if you have the time, I recommend it. By the way, if you want to read about of this trail and understand what happened to me, go to The Most Beautiful Trails of Peru.
Day 7: Jancarurish Campsite – Cullicocha Campsite
Distance: 16.9 km (10.5 mi)
Accumulated ascent: 1,142 m (3,746 ft)
Accumulated descent: 746 m (2,447 ft)
Minimum altitude: 4,006 m (13,143 ft)
Maximum altitude: 4,812 m (15,787 ft)
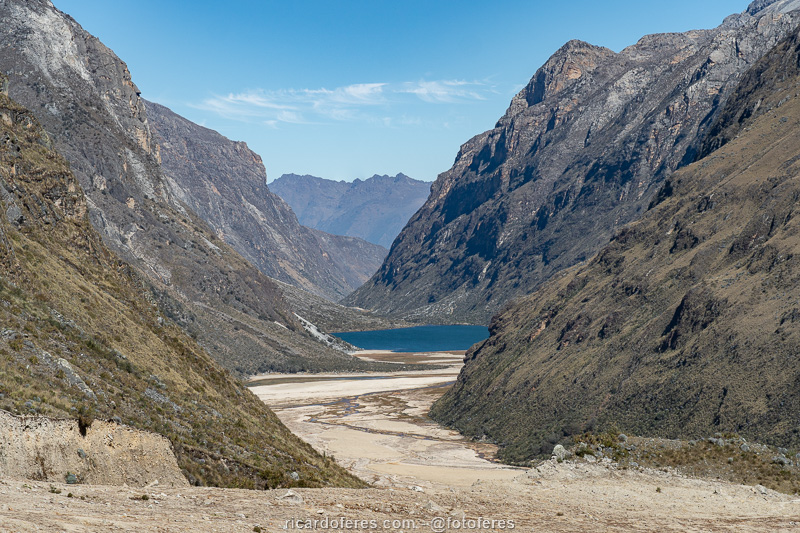
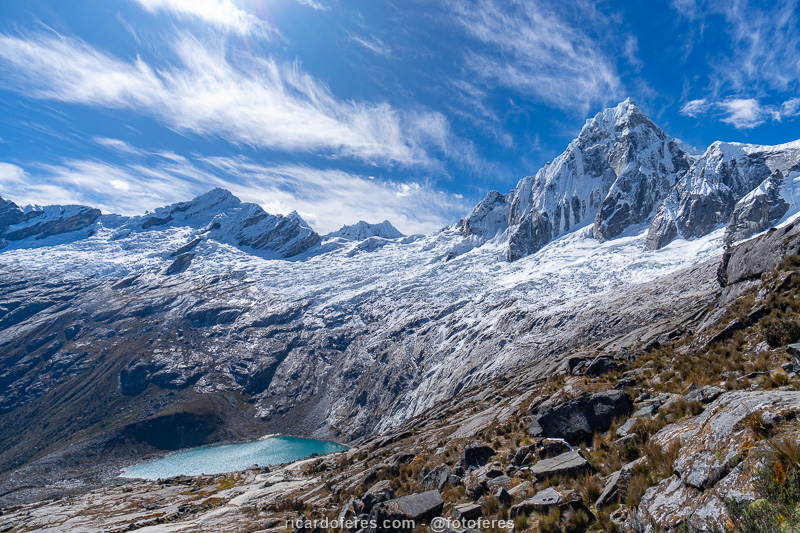
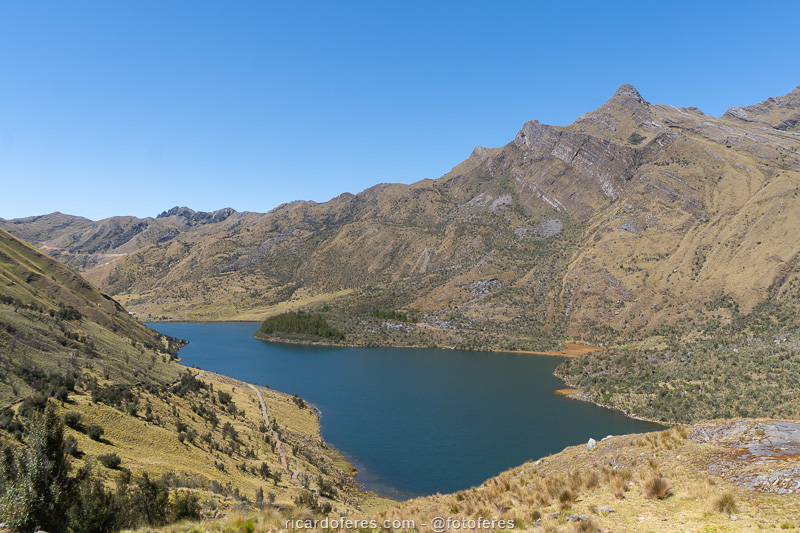
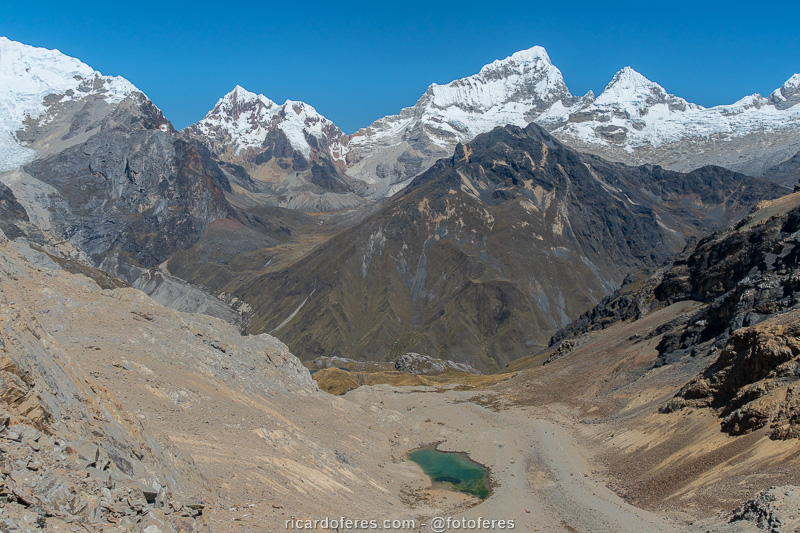
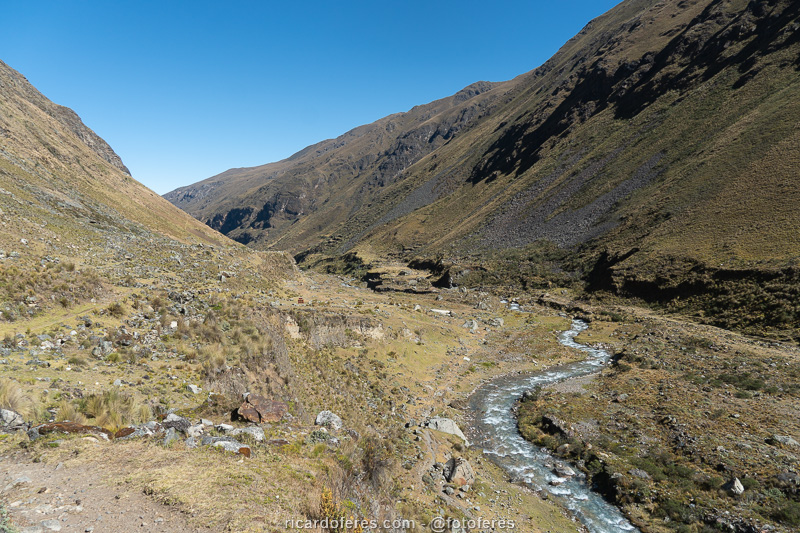
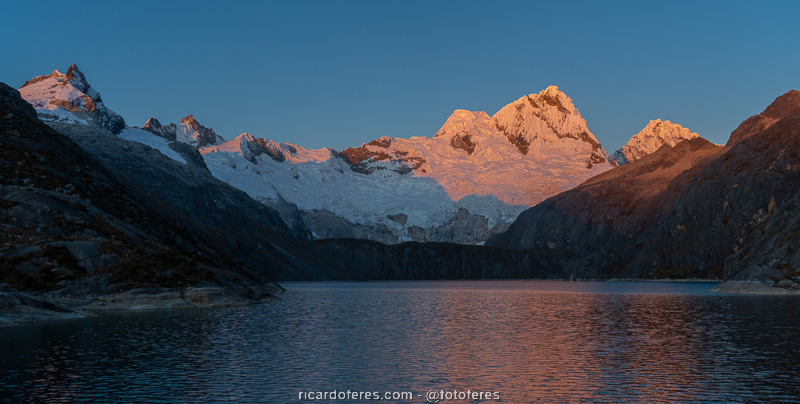
This day starts very easy, with 7 km on a slight slope through Quebrada Alpamayo, until it goes up to cross Paso Los Cedros and Paso Osoruri, then descending to Cullicocha Lagoon, with an incredible view of Santa Cruz.
As in all campsites in Valles Los Cedros, this one also has no structure.

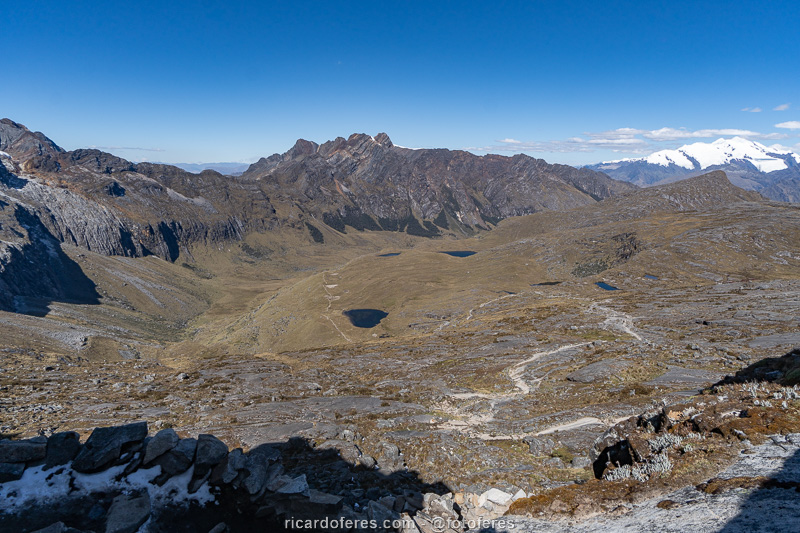
Day 8: Cullicocha Campsite – Hualcayan
Distance: 12.4 km (7.7 mi)
Accumulated ascent: 106 m (348 ft)
Accumulated descent: 1,477 m (4,845 ft)
Minimum altitude: 3,208 m (10,525 ft)
Maximum altitude: 4,601 m (15,095 ft)
On the last day, almost the entire trail is a long descent, until reaching the village of Hualcayan, where you will need to hire a taxi to go to Caraz, from where the vans to Huaraz leave. It is also possible to ask residents if they know anyone who can drive you there, it is quite possible that you will find someone who has a car and wants to earn some extra money, as happened to me. While taxis usually charge between 150 and 200 soles, I only paid 100 soles.
A third option, if you need to save money, is to walk to Cashapampa to return by van, but it is a 2.5-hour walk, with several ascents and descents.
Get to know the photo book "The Most Beautiful Trails of Patagonia"
Torres del Paine, El Chaltén, Bariloche, Ushuaia, Villarrica, Cerro Castillo, Dientes de Navarino and Parque Patagonia